








Can I use acrylic router bits for making 3D shapes in acrylic?
As a trusted supplier of Acrylic Router Bits, I often get asked whether it's possible to use these bits for creating 3D shapes in acrylic. The short answer is yes, but there's a lot more to it than just a simple affirmation. In this blog, I'll delve into the details of using acrylic router bits for 3D acrylic shaping, exploring the types of bits, the process, and some key considerations.
Types of Acrylic Router Bits Suitable for 3D Shapes
When it comes to making 3D shapes in acrylic, not all router bits are created equal. Different types of bits offer unique cutting capabilities that can be harnessed to achieve specific 3D effects.
Ball Nose Router Bit: One of the most popular choices for 3D carving in acrylic is the Ball Nose Router Bit. The rounded tip of this bit allows for smooth, curved cuts, making it ideal for creating organic shapes, such as spheres, domes, and free - form sculptures. The ball nose design enables the bit to cut across the surface of the acrylic at various angles, providing a high level of precision and detail. Whether you're working on a small decorative piece or a large - scale 3D installation, the ball nose router bit can help you achieve the desired curvature and smooth finish.


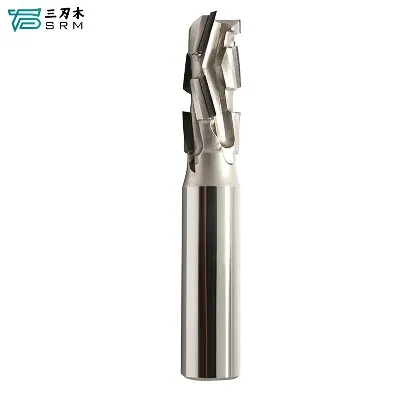
Compression Bits: Compression Bits are another excellent option for 3D acrylic work. These bits have a unique design that combines both up - cut and down - cut flutes. The up - cut flutes on the bottom of the bit pull the chips up and out of the cut, while the down - cut flutes on the top push the chips down. This dual - action helps to prevent chipping on both the top and bottom surfaces of the acrylic, resulting in a clean, high - quality cut. Compression bits are particularly useful when creating 3D shapes with flat or near - flat surfaces, as they can maintain a smooth finish throughout the cutting process.
Spiral Down Cut Bit: Spiral Down Cut Bit is also well - suited for 3D acrylic shaping. The spiral design of the bit allows for efficient chip removal and smooth cutting action. The down - cut motion of the bit pushes the chips down into the workpiece, which helps to reduce the risk of chipping on the top surface of the acrylic. This makes it a great choice for creating detailed 3D reliefs and inlays, where a clean, sharp edge is required.
The Process of Making 3D Shapes in Acrylic with Router Bits
Once you've selected the appropriate router bit for your 3D project, it's important to follow a proper process to ensure the best results.
Design and Planning: Before you start cutting, you need to have a clear design in mind. Use a 3D modeling software to create a digital representation of your desired shape. This will allow you to visualize the final product and make any necessary adjustments before you begin cutting. You can also use the software to generate a toolpath for your router, which will guide the bit along the correct cutting path.
Material Preparation: Choose a high - quality acrylic sheet that is suitable for your project. Make sure the sheet is clean and free of any scratches or debris. Secure the acrylic sheet firmly to your router table using clamps or a vacuum hold - down system. This will prevent the sheet from moving during the cutting process, which could result in inaccurate cuts or damage to the bit.
Router Setup: Set up your router with the selected bit. Make sure the bit is properly installed and tightened. Adjust the router speed according to the type of bit and the thickness of the acrylic. Generally, a higher speed is recommended for thinner acrylic sheets, while a lower speed may be required for thicker sheets.
Cutting: Start the router and slowly lower the bit into the acrylic. Follow the toolpath generated by your 3D modeling software, making sure to move the router at a consistent speed. Take your time and make multiple passes if necessary, especially when cutting deep into the acrylic. This will help to prevent overheating of the bit and ensure a clean, precise cut.
Finishing: After the cutting is complete, remove the acrylic piece from the router table. Use sandpaper or a polishing compound to smooth any rough edges or surfaces. You can also use a heat gun to remove any small burrs or imperfections. This will give your 3D acrylic shape a professional, finished look.
Key Considerations
While using acrylic router bits for 3D shaping is a viable option, there are some key considerations that you need to keep in mind.
Heat Generation: Cutting acrylic can generate a significant amount of heat, which can cause the acrylic to melt or warp. To prevent this, make sure to use a coolant or lubricant during the cutting process. You can also use a lower feed rate and multiple passes to reduce the heat buildup.
Bit Wear: Acrylic is a relatively hard material, and continuous cutting can cause the router bits to wear out quickly. Regularly inspect your bits for signs of wear, such as dull edges or chipping. Replace the bits as needed to ensure consistent cutting performance.
Safety: Working with routers and acrylic can be dangerous. Always wear appropriate safety gear, such as safety glasses, gloves, and a dust mask. Make sure your router is properly grounded and that you follow all safety instructions provided by the manufacturer.
Conclusion
In conclusion, using acrylic router bits for making 3D shapes in acrylic is not only possible but also a highly effective way to create unique, detailed, and professional - looking 3D pieces. By choosing the right type of bit, following a proper process, and considering the key factors, you can achieve excellent results.
If you're interested in purchasing high - quality acrylic router bits for your 3D acrylic projects, we are here to help. Our wide range of router bits, including Ball Nose Router Bit, Compression Bits, and Spiral Down Cut Bit, are designed to meet the needs of both hobbyists and professional woodworkers. Contact us today to discuss your specific requirements and start creating amazing 3D shapes in acrylic.
References
- Woodworking Magazine: Articles on advanced router bit applications.
- Acrylic Manufacturer's Guides: Information on working with acrylic materials.
- Router Manufacturer's Manuals: Guidelines for router setup and operation.


