



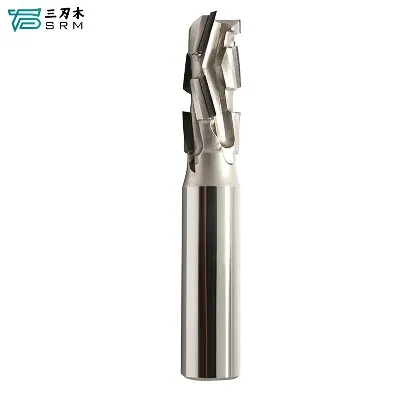





Hey there! As a supplier of Acrylic Router Bits, I often get asked how to prevent jamming of these bits. It's a common issue that can really slow down your work and damage your materials, so I'm here to share some tips and tricks that I've picked up over the years.
First off, let's talk about what causes jamming in the first place. There are a few main culprits:
1. Build - up of debris
When you're using acrylic router bits, small pieces of acrylic can build up on the bit itself. This debris can clog the flutes of the bit, preventing it from cutting efficiently and causing it to jam. Think of it like a drain getting clogged with hair and soap scum. The more debris that accumulates, the harder it is for the bit to do its job.
2. Incorrect feed rate
If you're pushing the router too fast or too slow through the acrylic, it can lead to jamming. A feed rate that's too fast doesn't give the bit enough time to cut through the material cleanly, causing it to push the acrylic rather than cut it. On the other hand, a feed rate that's too slow can cause excessive heat buildup and more debris to stick to the bit.
3. Dull bits
Over time, the cutting edges of the router bits can become dull. A dull bit has to work harder to cut through the acrylic, which generates more heat and makes it more likely for debris to stick. It's like trying to cut through a steak with a butter knife – it's going to be a struggle and things will get messy.
4. Improper bit selection
Not all router bits are created equal, and using the wrong type of bit for the job can lead to jamming. For example, if you're trying to do a delicate contouring job on acrylic with a heavy - duty straight bit, it may not be the best fit.
Okay, now that we know what causes jamming, let's talk about how to prevent it.
Keep the bits clean
Regular cleaning is crucial. After each use, take a few minutes to remove any debris from the bit. You can use a brush or a compressed air canister to blow the small pieces of acrylic off the bit. Make sure you get into all the nooks and crannies, especially the flutes. If you notice a lot of stubborn debris that won't come off, you can soak the bit in a mild solvent for a short period, but be careful not to damage the cutting edges.
Adjust the feed rate
Finding the right feed rate takes a bit of trial and error. Start by referring to the manufacturer's recommendations for the specific router bit you're using. These guidelines usually give you a good starting point. Then, make small adjustments based on how the bit is performing. If you notice the bit starting to push the acrylic or if there's excessive heat, slow down the feed rate. If the cut seems too slow and the bit is getting clogged with debris, speed it up a bit.
Sharpen or replace dull bits
Keep an eye on the condition of your bits. If you notice that the cuts are starting to look rough or if the bit is struggling to cut through the acrylic, it's probably time to sharpen or replace it. Sharpening can be a bit tricky and may require some specialized tools, so if you're not confident in your sharpening skills, it's often easier and safer to just replace the bit. We offer high - quality Ball Nose Router Bit, Compression Bits, and Straight Router Bit that are designed to stay sharp for a long time.
Choose the right bit for the job
Selecting the appropriate router bit is essential. For straight cuts in acrylic, a Straight Router Bit is a great choice. If you're doing more complex 3D work, a Ball Nose Router Bit might be better suited. And for jobs where you need to prevent chipping on both the top and bottom of the acrylic, Compression Bits are the way to go.
Use lubricants
Applying a lubricant to the acrylic or the bit can help reduce friction and prevent debris from sticking. There are some specialized acrylic cutting lubricants available on the market. You can also use a light coat of wax on the surface of the acrylic before cutting. Just make sure to clean the surface thoroughly after cutting to remove any residue.
Maintain proper router settings
In addition to the feed rate, other router settings like the spindle speed also play a role. Higher spindle speeds are generally better for cutting acrylic, but you need to make sure it's within the recommended range for your bit. Check the manufacturer's specifications to find the optimal spindle speed for your specific router bit.
Secure the material
Make sure the acrylic is properly secured before you start cutting. If the material moves around during the cutting process, it can cause the bit to bind and jam. You can use clamps or a vacuum table to hold the acrylic in place.
By following these tips, you can significantly reduce the chances of your acrylic router bits jamming. This will not only save you time and frustration but also ensure that you get high - quality cuts every time.
If you're in the market for high - performance acrylic router bits or have any questions about preventing jamming, don't hesitate to reach out. We're here to help you find the right solutions for your woodworking or acrylic - working needs. Whether you're a professional woodworker or a DIY enthusiast, we've got the products and knowledge to support you.


References
- "Router Bit Basics" - Woodworking Magazine
- Manufacturer's guides for acrylic router bits


