



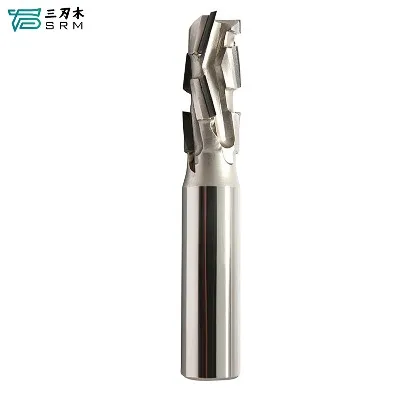

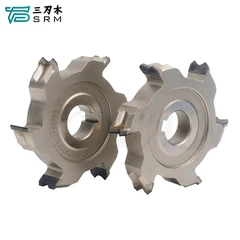





Hey there, fellow woodworking enthusiasts! As a supplier of spiral cutterheads, I've seen firsthand the importance of ensuring proper coaxiality during installation. It's a crucial step that can make or break the performance of your cutterhead and, ultimately, the quality of your woodworking projects. In this blog post, I'll share some tips and tricks on how to ensure the coaxiality of a spiral cutterhead during installation.
First things first, let's talk about what coaxiality is. Coaxiality refers to the alignment of the cutterhead's axis with the spindle's axis. When the cutterhead and spindle are perfectly aligned, the cutterhead rotates smoothly and evenly, resulting in clean, precise cuts. On the other hand, if the cutterhead is not properly aligned, it can cause a variety of problems, including vibration, uneven cutting, and premature wear on the cutterhead and spindle.
So, how do you ensure the coaxiality of a spiral cutterhead during installation? Here are some steps you can follow:


Step 1: Prepare the Workspace
Before you start installing the cutterhead, it's important to prepare your workspace. Make sure the area is clean and free of debris, and that you have all the necessary tools and equipment on hand. You'll also want to make sure the spindle is clean and free of any dirt or debris that could affect the alignment of the cutterhead.
Step 2: Inspect the Cutterhead and Spindle
Once your workspace is prepared, it's time to inspect the cutterhead and spindle. Check the cutterhead for any signs of damage or wear, such as cracks, chips, or dull blades. You'll also want to check the spindle for any signs of damage or wear, such as scratches or dents. If you notice any damage or wear, it's important to replace the damaged parts before proceeding with the installation.
Step 3: Install the Cutterhead
Now it's time to install the cutterhead. Start by carefully placing the cutterhead onto the spindle, making sure it is centered and aligned with the spindle's axis. You may need to use a torque wrench to tighten the bolts or nuts that secure the cutterhead to the spindle. Make sure you follow the manufacturer's instructions for tightening the bolts or nuts, as over-tightening can cause damage to the cutterhead or spindle.
Step 4: Check the Coaxiality
Once the cutterhead is installed, it's important to check the coaxiality. You can do this using a dial indicator or a laser alignment tool. A dial indicator is a simple tool that measures the amount of runout, or deviation from the true axis, of the cutterhead. A laser alignment tool is a more advanced tool that uses a laser beam to measure the alignment of the cutterhead and spindle.
To use a dial indicator, place the indicator on the cutterhead and rotate the spindle slowly. The indicator will show the amount of runout, or deviation from the true axis, of the cutterhead. If the runout is within the manufacturer's specifications, the cutterhead is properly aligned. If the runout is outside the manufacturer's specifications, you'll need to adjust the cutterhead until it is properly aligned.
To use a laser alignment tool, follow the manufacturer's instructions for setting up and using the tool. The tool will project a laser beam onto the cutterhead and spindle, allowing you to see the alignment of the two components. If the alignment is off, you'll need to adjust the cutterhead until it is properly aligned.
Step 5: Make Adjustments
If the coaxiality of the cutterhead is off, you'll need to make adjustments to the cutterhead until it is properly aligned. This may involve loosening the bolts or nuts that secure the cutterhead to the spindle and repositioning the cutterhead slightly. You may also need to use shims or other adjustment tools to fine-tune the alignment of the cutterhead.
Once you've made the necessary adjustments, recheck the coaxiality using the dial indicator or laser alignment tool. Repeat the adjustment process until the coaxiality is within the manufacturer's specifications.
Step 6: Test the Cutterhead
Once the coaxiality of the cutterhead is within the manufacturer's specifications, it's time to test the cutterhead. Start the spindle and let the cutterhead run for a few minutes at a low speed. Listen for any unusual noises or vibrations, and check the quality of the cuts. If everything looks and sounds good, you can gradually increase the speed of the spindle and continue testing the cutterhead.
If you notice any problems during the testing process, such as vibration, uneven cutting, or premature wear on the cutterhead or spindle, it's important to stop the machine immediately and recheck the coaxiality. You may need to make further adjustments to the cutterhead until the problem is resolved.
Tips and Tricks
Here are some additional tips and tricks to help you ensure the coaxiality of a spiral cutterhead during installation:
- Use High-Quality Tools and Equipment: Using high-quality tools and equipment, such as a torque wrench and a dial indicator or laser alignment tool, can help you ensure the coaxiality of the cutterhead.
- Follow the Manufacturer's Instructions: Make sure you follow the manufacturer's instructions for installing and adjusting the cutterhead. This will help you avoid making mistakes that could affect the alignment of the cutterhead.
- Take Your Time: Installing a spiral cutterhead can be a time-consuming process, but it's important to take your time and do it right. Rushing through the installation process can lead to mistakes that could affect the alignment of the cutterhead.
- Keep the Workspace Clean: Keeping the workspace clean and free of debris can help you avoid introducing dirt or debris into the cutterhead or spindle, which could affect the alignment of the cutterhead.
- Inspect the Cutterhead Regularly: Regularly inspecting the cutterhead for signs of damage or wear can help you catch problems early and prevent them from becoming more serious.
Conclusion
Ensuring the coaxiality of a spiral cutterhead during installation is a crucial step that can make or break the performance of your cutterhead and, ultimately, the quality of your woodworking projects. By following the steps outlined in this blog post and using the tips and tricks provided, you can ensure that your cutterhead is properly aligned and running smoothly.
If you're in the market for a high-quality spiral cutterhead, be sure to check out our Adjustable Edge Profiling Sets, Disposable Carbide Blade Tenon Milling Cutter, and Adjustable Grooving Tools Set. We offer a wide range of cutterheads and accessories to meet the needs of woodworking professionals and hobbyists alike.
If you have any questions or need further assistance with installing or adjusting a spiral cutterhead, please don't hesitate to contact us. We're here to help you get the most out of your woodworking equipment.
References
- Woodworking Machinery Handbook
- Spiral Cutterhead Installation Manual


