





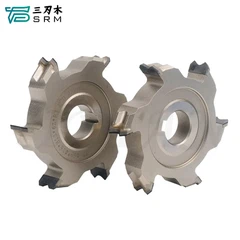







As a supplier of O Flute Router Bits, I've encountered numerous queries from customers regarding the optimal cleaning methods for these indispensable tools. Maintaining the cleanliness of your O Flute Router Bit is crucial for ensuring its longevity, performance, and precision. In this blog, I'll share insights on the best way to clean an O Flute Router Bit, drawing from my experience in the industry.
Understanding the Importance of Cleaning
Before delving into the cleaning process, it's essential to grasp why cleaning your O Flute Router Bit is so vital. Over time, these bits accumulate debris, such as wood chips, resin, and dust, during the routing process. This buildup can significantly affect the bit's cutting efficiency and accuracy. A dirty bit may cause rough cuts, increased friction, and premature wear, leading to subpar results and potentially costing you more in replacement bits.
Moreover, proper cleaning helps prevent corrosion and rust, especially if the bit is made of materials susceptible to oxidation. By keeping your O Flute Router Bit clean, you can extend its lifespan and maintain its sharpness, ensuring consistent performance job after job.


Gathering the Necessary Tools
To clean your O Flute Router Bit effectively, you'll need a few essential tools:
- Safety Gear: Prioritize safety by wearing protective gloves and safety glasses to shield yourself from sharp edges and debris.
- Cleaning Solvent: Choose a suitable cleaning solvent based on the type of debris on the bit. Isopropyl alcohol is a popular choice for removing general dirt and resin. For more stubborn residues, consider a specialized cutting tool cleaner.
- Soft-Bristled Brush: Opt for a soft-bristled brush, such as a toothbrush or a dedicated tool cleaning brush, to gently scrub the bit without damaging its cutting edges.
- Compressed Air: A can of compressed air is invaluable for blowing out any loose debris from the flutes and crevices of the bit.
- Lint-Free Cloth: Use a lint-free cloth to dry the bit after cleaning and to apply any lubricants or rust inhibitors.
Step-by-Step Cleaning Process
Now that you have your tools ready, let's walk through the step-by-step process of cleaning an O Flute Router Bit:
Step 1: Disconnect and Inspect
Before cleaning, ensure that the router is unplugged or turned off to prevent any accidents. Carefully remove the O Flute Router Bit from the router collet, taking note of its orientation. Inspect the bit for any signs of damage, such as chipped or dull cutting edges. If you notice any significant damage, it may be time to replace the bit.
Step 2: Remove Loose Debris
Use the can of compressed air to blow out any loose debris from the flutes and cutting edges of the bit. Hold the bit at a slight angle to allow the debris to fall away. This step helps prevent scratching the bit during the subsequent cleaning process.
Step 3: Soak in Cleaning Solvent
Pour a small amount of the cleaning solvent into a shallow container. Submerge the O Flute Router Bit in the solvent, ensuring that all the cutting edges and flutes are fully covered. Let the bit soak for a few minutes to loosen any stubborn debris and resin.
Step 4: Scrub Gently
After soaking, use the soft-bristled brush to gently scrub the bit, paying close attention to the flutes and cutting edges. Work the brush in a circular motion to dislodge any remaining debris. Be careful not to apply too much pressure, as this can damage the delicate cutting edges.
Step 5: Rinse and Dry
Once you've scrubbed the bit thoroughly, remove it from the cleaning solvent and rinse it under running water to remove any remaining solvent and debris. Pat the bit dry with a lint-free cloth, ensuring that it is completely dry before proceeding.
Step 6: Apply Lubricant or Rust Inhibitor
To prevent corrosion and ensure smooth operation, apply a small amount of lubricant or rust inhibitor to the bit. Use a clean cloth to spread the lubricant evenly over the cutting edges and flutes. This step helps protect the bit from moisture and extends its lifespan.
Step 7: Store Properly
After cleaning and lubricating the bit, store it in a dry, protected place. Consider using a bit case or holder to keep the bit organized and prevent it from getting damaged. Avoid storing the bit in a damp environment, as this can lead to rust and corrosion.
Additional Tips for Maintaining Your O Flute Router Bit
In addition to regular cleaning, here are some additional tips to help you maintain your O Flute Router Bit:
- Use the Right Feed Rate and Speed: Operating the router at the correct feed rate and speed can help reduce the amount of debris and heat generated during the routing process, prolonging the life of the bit.
- Avoid Overloading the Bit: Don't push the bit beyond its limits by attempting to cut through materials that are too thick or hard. This can cause excessive wear and damage to the bit.
- Inspect the Bit Regularly: Periodically inspect the bit for signs of wear, such as dull cutting edges or chipping. Replace the bit as soon as you notice any significant damage to ensure optimal performance.
- Clean the Router Collet: A dirty router collet can cause the bit to vibrate and become loose, affecting the quality of the cuts. Clean the collet regularly to ensure a secure fit.
Related Products
If you're in the market for high-quality router bits, I'd like to introduce you to some of our other products:
- Round Slotting Router Bit: Ideal for creating precise round slots in a variety of materials.
- Aluminum Router Bit: Specifically designed for cutting aluminum and other non-ferrous metals with ease.
- Roughing End Mill Cutter: Perfect for quickly removing large amounts of material during the roughing process.
Contact Us for More Information
If you have any questions about cleaning your O Flute Router Bit or are interested in learning more about our products, please don't hesitate to contact us. Our team of experts is here to assist you in finding the right solutions for your routing needs. We look forward to serving you and helping you achieve the best results with your projects.
References
[1] Johnson, A. (2020). The Complete Guide to Router Bit Maintenance. Woodworking Magazine.
[2] Smith, B. (2019). Tips for Extending the Life of Your Router Bits. Tool Review Journal.
[3] Davis, C. (2018). How to Clean and Maintain Router Bits. DIY Woodworking Blog.


