








Hey there, fellow DIY enthusiasts and professionals! If you're in the woodworking or metalworking game, you know how crucial it is to start a hole right, especially when using a Forstner drill bit. I'm a supplier of Forstner Drill Bits, and today, I'm gonna share with you the best way to start a hole with these amazing tools.
First off, let's talk a bit about Forstner drill bits. They're super handy for creating flat-bottomed holes, which are great for things like dowel joints, inlay work, and creating recesses for hardware. Unlike regular twist drill bits, Forstner bits have a flat cutting edge that allows them to bore clean, precise holes without splintering the material.
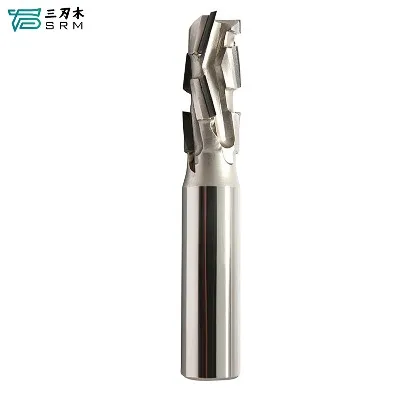
Now, let's get into the nitty-gritty of starting a hole with a Forstner drill bit. The first step is to choose the right bit for the job. Forstner bits come in a variety of sizes, so make sure you pick one that's the right diameter for the hole you need to drill. You can find a wide range of Forstner bits on our website, including the Solid Carbide Dowel Drill Bit, which is perfect for creating strong dowel joints.
Once you've selected the right bit, it's time to prepare your workpiece. Make sure the surface is clean and free of any debris or dust. You can use a sandpaper to smooth the surface if needed. Next, mark the center of the hole where you want to drill. You can use a center punch or a nail to make a small indentation at the center point. This will help the drill bit stay in place and prevent it from wandering.
Now, it's time to set up your drill. If you're using a drill press, make sure the bit is properly installed and tightened. Adjust the depth stop on the drill press to the desired depth of the hole. If you're using a handheld drill, make sure you have a good grip on the drill and that it's set to the appropriate speed. Forstner bits work best at a slower speed, so make sure you're not going too fast.
Before you start drilling, it's a good idea to practice on a scrap piece of material. This will help you get a feel for how the bit works and allow you to make any necessary adjustments. Once you're comfortable, it's time to start drilling. Place the drill bit on the center mark you made earlier and apply gentle pressure. Start the drill and slowly lower the bit into the material. Make sure you're keeping the drill perpendicular to the surface to ensure a straight hole.
As you're drilling, you may notice that the bit starts to heat up. This is normal, but you don't want it to get too hot. To prevent overheating, you can use a lubricant such as cutting oil or wax. Apply the lubricant to the bit before you start drilling and periodically during the drilling process. This will help reduce friction and keep the bit cool.
Once you've drilled the hole to the desired depth, stop the drill and carefully remove the bit from the material. Make sure you're holding the drill steady to prevent any damage to the hole or the bit. You can use a brush or compressed air to clean out any chips or debris from the hole.
Now, let's talk about some common mistakes to avoid when using a Forstner drill bit. One of the most common mistakes is using too much pressure. Forstner bits are designed to cut through the material slowly and smoothly, so applying too much pressure can cause the bit to break or damage the material. Another mistake is not using a lubricant. As I mentioned earlier, using a lubricant helps reduce friction and prevent overheating.
Another thing to keep in mind is that Forstner bits are not designed for drilling through thick materials. If you need to drill through a thick piece of wood or metal, you may need to use a different type of drill bit, such as a Through Hole Drill Bit.
In addition to starting a hole with a Forstner drill bit, you may also need to countersink the hole. Countersinking is the process of creating a conical recess at the top of the hole to allow the head of a screw or bolt to sit flush with the surface. To countersink a hole, you can use a Countersink Drill Bit. Simply attach the countersink bit to your drill and lower it into the hole until the desired depth is reached.
In conclusion, starting a hole with a Forstner drill bit is a relatively simple process, but it does require some practice and patience. By following the steps outlined in this blog post, you can ensure that you're starting your holes right and getting the best results possible. If you have any questions or need further assistance, don't hesitate to contact us. We're here to help you find the right Forstner drill bit for your needs and provide you with the support you need to get the job done.
So, what are you waiting for? Start exploring our selection of Forstner drill bits today and take your woodworking and metalworking projects to the next level. And if you're interested in purchasing our products, feel free to reach out to us for a quote or to discuss your specific requirements. We look forward to working with you!
References:


- Woodworking Magazine
- DIY Network
- Home Depot Blog


