









Hey there, fellow woodworking enthusiasts! I'm [your name], and I'm super stoked to share my knowledge about using a straight router bit for dado grooves in different thicknesses of wood. As a supplier of top - notch straight router bits, I've seen firsthand how a good bit can transform your woodworking projects. So, let's dive right in!
Understanding Dado Grooves
First things first, what exactly are dado grooves? Well, a dado groove is a flat - bottomed channel cut across the grain of a piece of wood. It's commonly used to join pieces of wood together, like when you're building cabinets, bookshelves, or tables. The dado groove provides a strong and stable connection, making your finished project more durable.
Choosing the Right Straight Router Bit
When it comes to cutting dado grooves, not all straight router bits are created equal. You need to pick a bit that's the right size and quality for the job.
Size Matters
The size of the straight router bit you choose depends on the width of the dado groove you want to cut. For example, if you're making a dado groove for a 1/4 - inch thick shelf, you'll want a router bit that's 1/4 - inch wide. It's important to measure carefully and choose a bit that matches the thickness of the wood you'll be inserting into the groove.
Quality is Key
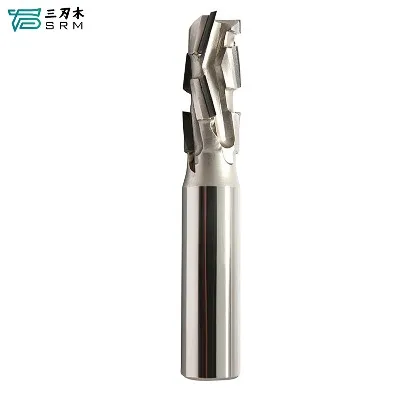
As a straight router bit supplier, I can't stress enough the importance of using a high - quality bit. A good bit will cut cleanly and smoothly, reducing tear - out and making your work look professional. Look for bits made from solid carbide, like our O Flute Router Bit. Solid carbide bits are extremely hard and wear - resistant, which means they'll last longer and give you better results.
Preparing Your Wood
Before you start cutting dado grooves, you need to prepare your wood properly.
Measuring and Marking
Measure and mark the location of the dado grooves on your wood. Use a combination square or a marking gauge to ensure your lines are straight and accurate. Double - check your measurements to avoid any mistakes.
Securing the Wood
Once you've marked your wood, you need to secure it firmly to your workbench. You can use clamps or a vise to hold the wood in place. Make sure the wood is stable and won't move while you're cutting.
Setting Up Your Router
Now that your wood is prepared, it's time to set up your router.
Adjusting the Depth
The depth of the dado groove is determined by the depth setting on your router. You'll want to set the depth of the router bit to match the thickness of the wood you're using. For example, if you're making a dado groove for a 1/4 - inch thick shelf, set the router bit to cut a 1/4 - inch deep groove.


Choosing the Right Speed
The speed of your router is also important. Different woods and router bits require different speeds. As a general rule, you should use a slower speed for harder woods and a faster speed for softer woods. Check the manufacturer's recommendations for your router bit to find the optimal speed.
Cutting Dado Grooves in Different Thicknesses of Wood
Thin Wood (1/8 - inch to 1/4 - inch)
When cutting dado grooves in thin wood, you need to be extra careful. The wood is more likely to break or splinter, so use a sharp router bit and a slow feed rate. Make multiple passes with the router, gradually increasing the depth of the cut with each pass. This will help prevent tear - out and ensure a clean cut.
Medium - Thickness Wood (1/4 - inch to 3/8 - inch)
For medium - thickness wood, you can use a slightly faster feed rate. However, you still need to make multiple passes to achieve the desired depth. Start with a shallow cut and gradually increase the depth until you reach the correct thickness.
Thick Wood (3/8 - inch and above)
Cutting dado grooves in thick wood requires more power and a slower feed rate. You may need to make several passes with the router to cut through the wood. Use a sharp router bit, like our Spiral Milling Cutter, to help reduce tear - out and make the cutting process easier.
Tips and Tricks
Here are some additional tips and tricks to help you get the best results when using a straight router bit for dado grooves:
Use a Router Table
A router table can make it easier to control the router and cut straight, accurate dado grooves. You can set up the router table to hold the wood securely and guide the router along the marked lines.
Clear the Chips
As you're cutting, make sure to clear the chips from the dado groove regularly. This will prevent the chips from building up and causing the router bit to overheat or break.
Sand the Grooves
After you've cut the dado grooves, sand the edges to smooth out any rough spots. This will make it easier to insert the wood into the grooves and give your project a professional finish.
Troubleshooting
Even with the best preparation and technique, you may run into some problems when cutting dado grooves. Here are some common issues and how to fix them:
Tear - Out
Tear - out occurs when the wood splinters or breaks as the router bit cuts through it. To prevent tear - out, use a sharp router bit, make multiple passes, and use a backer board to support the wood.
Uneven Grooves
If your dado grooves are uneven, it could be because the router bit is dull or the wood is not secured properly. Check the router bit for wear and make sure the wood is clamped firmly to the workbench.
Burning
Burning can occur if the router bit is dull, the feed rate is too slow, or the router is overheating. Replace the router bit if it's dull, increase the feed rate, and give the router a break if it starts to get hot.
Conclusion
Using a straight router bit for dado grooves in different thicknesses of wood can be a challenging but rewarding task. By choosing the right bit, preparing your wood properly, setting up your router correctly, and following the tips and tricks I've shared, you can achieve professional - looking results.
As a straight router bit supplier, I'm here to help you with all your woodworking needs. Whether you're a beginner or an experienced woodworker, we have a wide range of high - quality router bits, including Spiral Down Cut Bit, to suit your projects. If you're interested in purchasing our router bits or have any questions, don't hesitate to get in touch. We'd love to start a conversation about how we can help you take your woodworking to the next level.
References
- "Woodworking for Beginners: A Comprehensive Guide" by John Smith
- "Router Techniques: Mastering the Art of Cutting" by Jane Doe
- Manufacturer's manuals for router bits and routers


